In lesson one we will teach you how to prepare your photos for Facebook. Rather than uploading them straight from your phone or PC, your pictures will look FAR better if you run them through Gimp first.
Step 1. Transfer your pictures to your PC. Connect the USB cable from your cam to your computer and turn on the cam. Follow the windows prompts and dump all your shots into a folder on the desktop. Alternatively you can yank the memory card out of your phone or camera and use a card reader to acheive the same end.
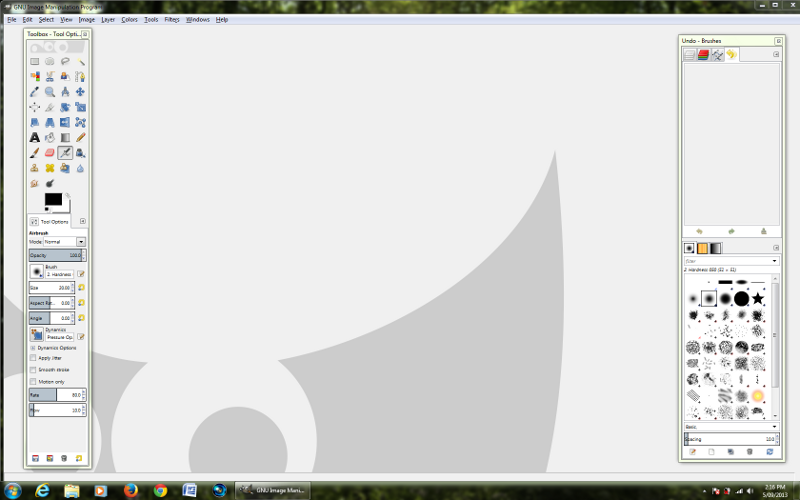
Step 2. Fire up Gimp and maximise the workspace window by clicking the small square icon button on the top right hand side.
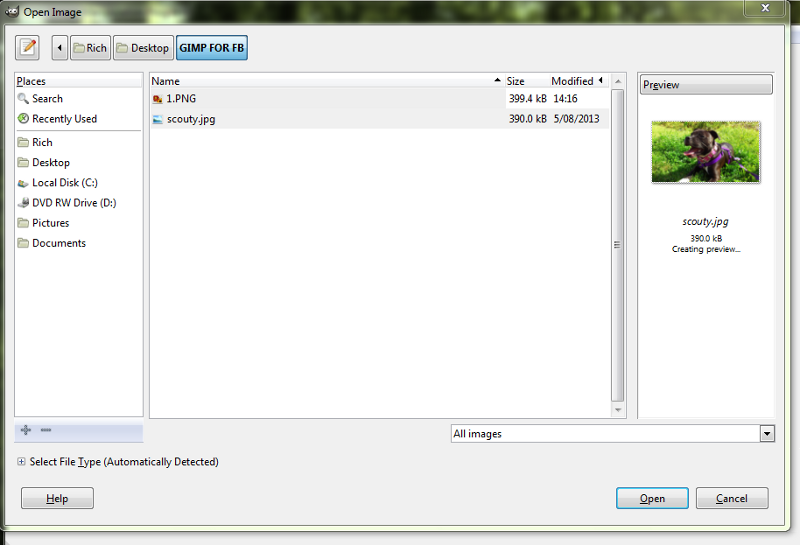
Step 3. Look for the word menus on the upper left and choose: File > Open > Browse. You will see this box pop up. Navigate to the photo you want to work on, click it once and choose the Open button on the lower left of the box.
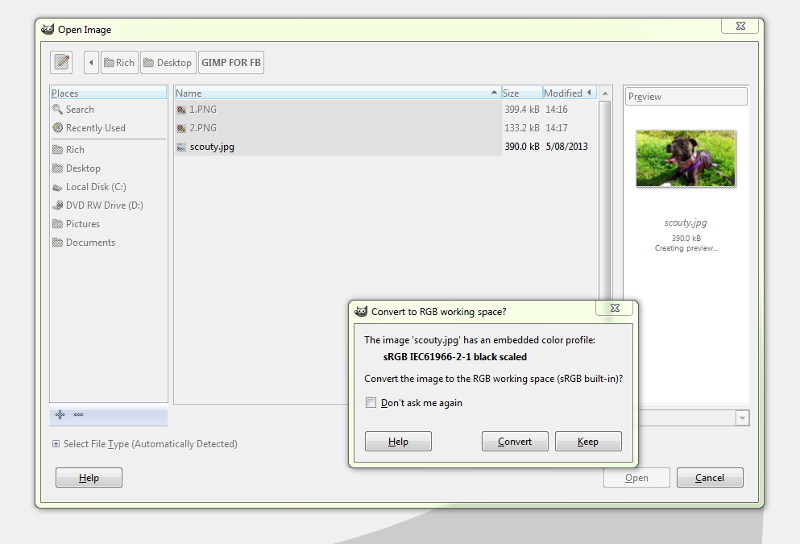
Step 4. If the pic is straight from your cam or phone it will open up straight away in the workspace. If its a picture you've downloaded then occasionally you will need to let Gimp convert it into something it can work with. If you see this small popup box then simply click the Convert button.
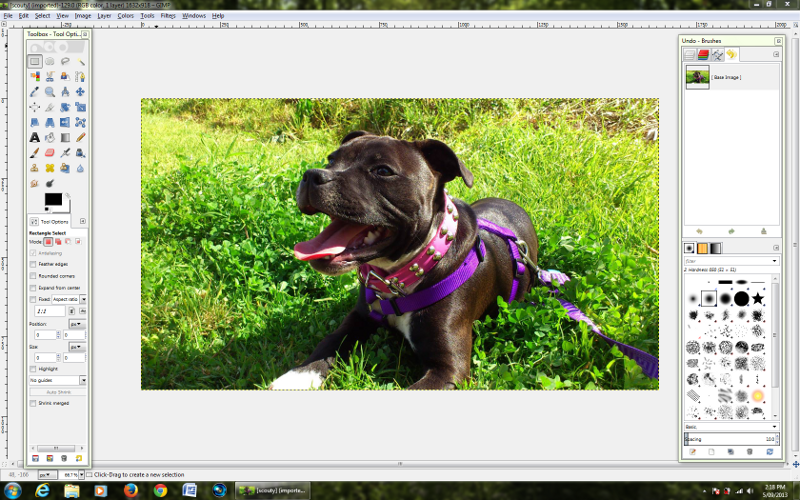
Step 5. Here's our picture in the work space. Pictures straight off the cam are often way too large for facebook and if you upload them like that then FB will resize it for you. Unfortunately when FB does resizing it often does a crappy job and your pic will either be slightly blurry or have jaggy lines in the image instead of smooth ones. We'll resize our own pics in Gimp before we upload.
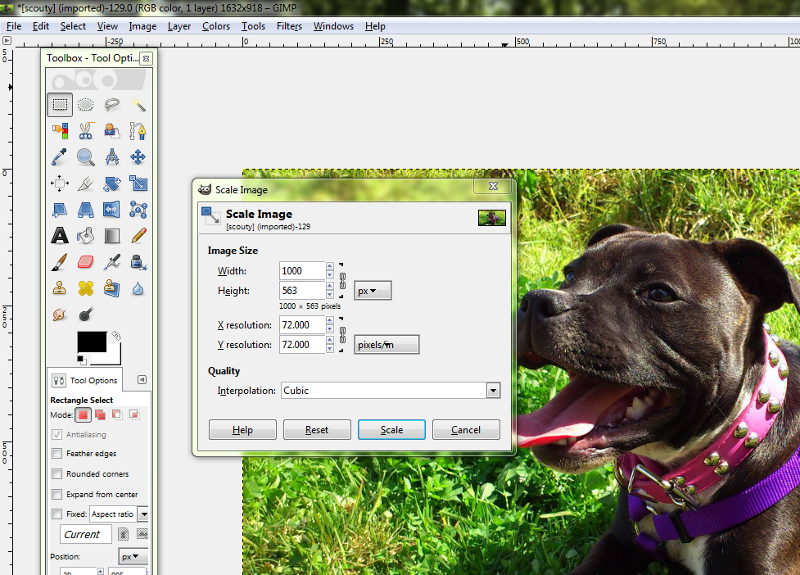
Step 6. From the word menu (upper Left) select > Image > Scale image. You will be greeted with this popup box to resize your picture. The current maximum width for a picture that FB will display is 1000 pixels wide so that's what we will go for.
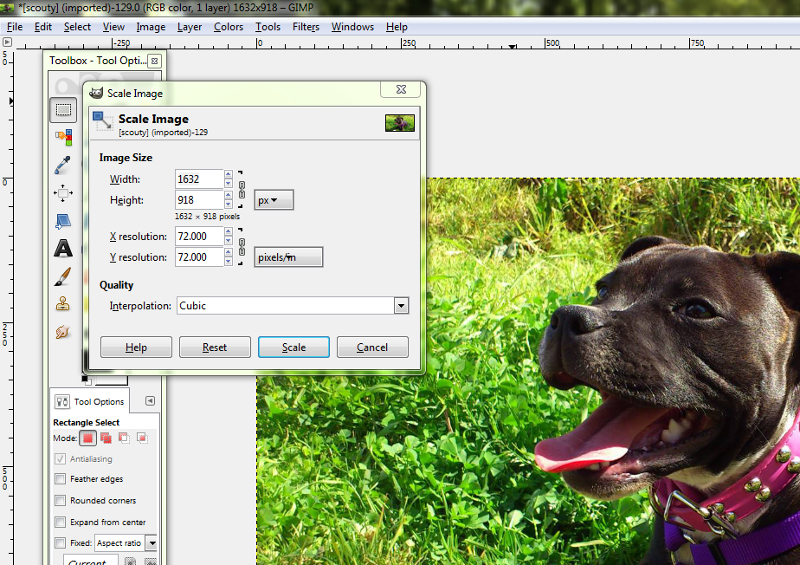
Step 7. Change the number in the top box labelled Width to 1000. Next click the Scale button on the popup window. Its that easy.
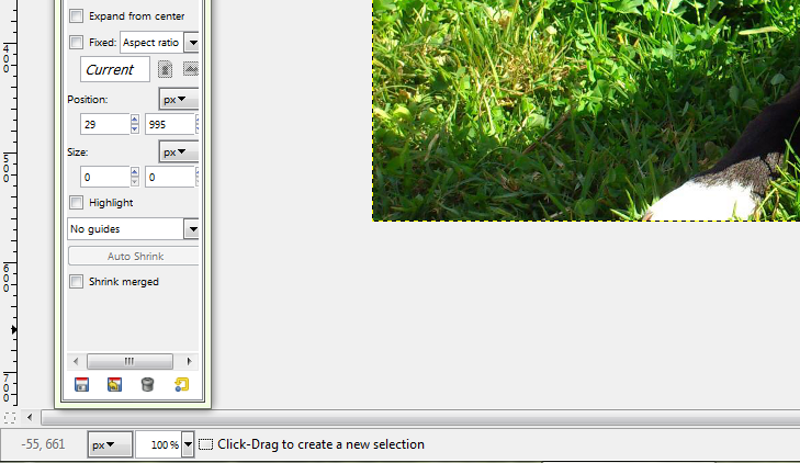
Step 8. Look at the magnification control at bottom left, change it to 100% to see your scaled picture full size.
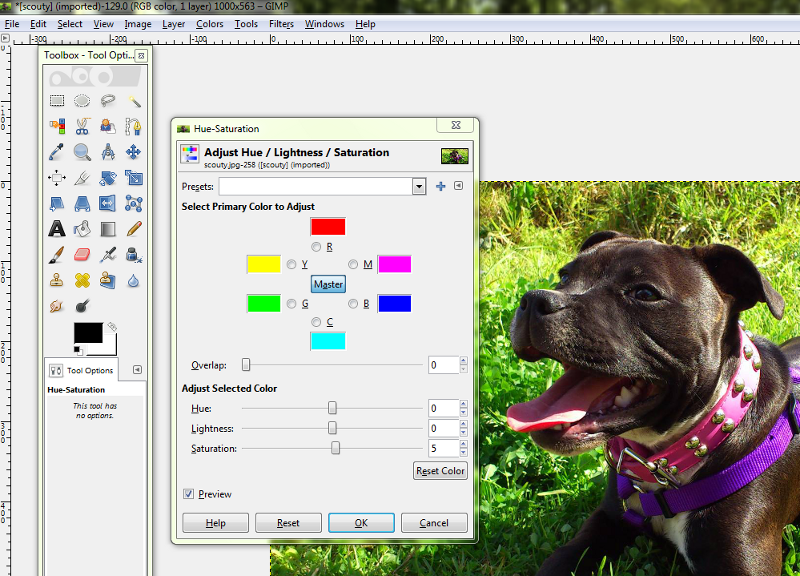
Step 9. Boosting Color. Most images I shoot for web work require a color boost regardless of what type of cam I used. Increasing the color saturation will really make your photos stand out. Find the word menu Colors (upper left) and navigate to Colors > Hue-Saturation. You will be greeted with this popup window. Click and drag the bottom slider labelled Saturation to the right, a little at a time until you're happy with how the image looks. There's no hard and fast rules here regarding how much saturation to use, each photo is different. When you're happy with the result Click the OK button.
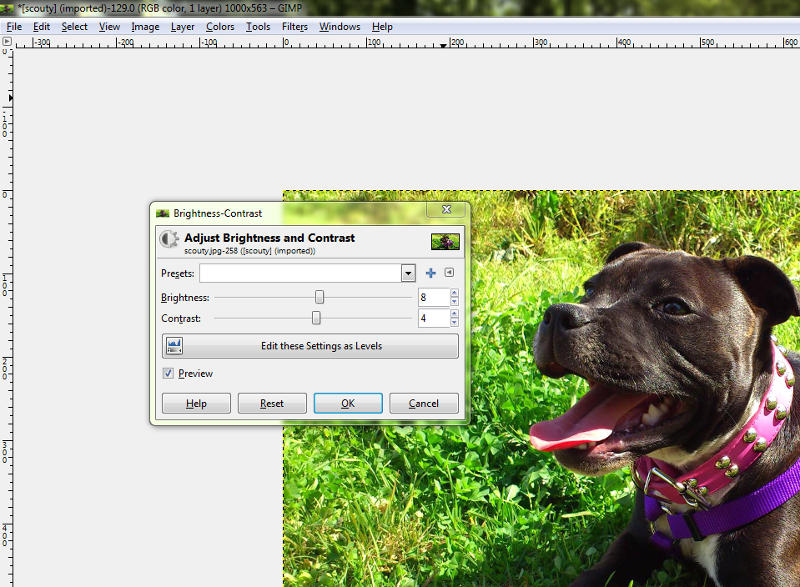
Step 10. Adjusting Brightness and Contrast. Again most images I shoot for web work require a Brightness and contrast tweak to get them jumping off the page at the viewer. Navigate to Colors > Brightness-Contrast and you'll see the following popup window. Start by tweaking the Brightness control until there is a little bit too much white in the picture. Next slide the contrast control to the right, a little at a time until the black parts of the image are jet black and the white parts of the image are snow white. Click OK when you're happy with the changes.
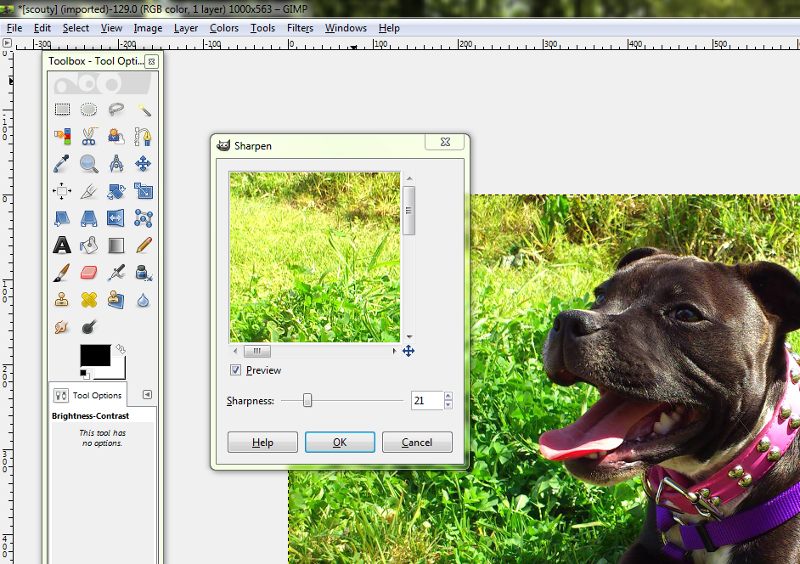
Step 11. Sharpening up the image. Whenever you resize a picture it will make it slightly blurry. If you are working on portraits of people its often a good idea to leave the sharpen stage out of your process and give the portrait a gentle soft feel. For everything else you'll want to sharpen the picture up. Navigate to Filters > Enhance > Sharpen. Typically use a value between 20 and 30 here for most photos. If you started with a slightly blurry pic straight off the camera you can often save it by using a sharpen value of 40 to 50. If you sharpen too much your pic will look grainy and the outlines of things in the picture will look jaggy not smooth (be mindful of that). When you're happy with the result click OK.
Step 12. You're ready to save your picture ! Gimp uses the Export command to save pictures so lets do that. Navigate to File > Export and you'll see this popup window. Rename your picture and choose a location for the file to be saved to. Click the Export button when you're happy with your choices.
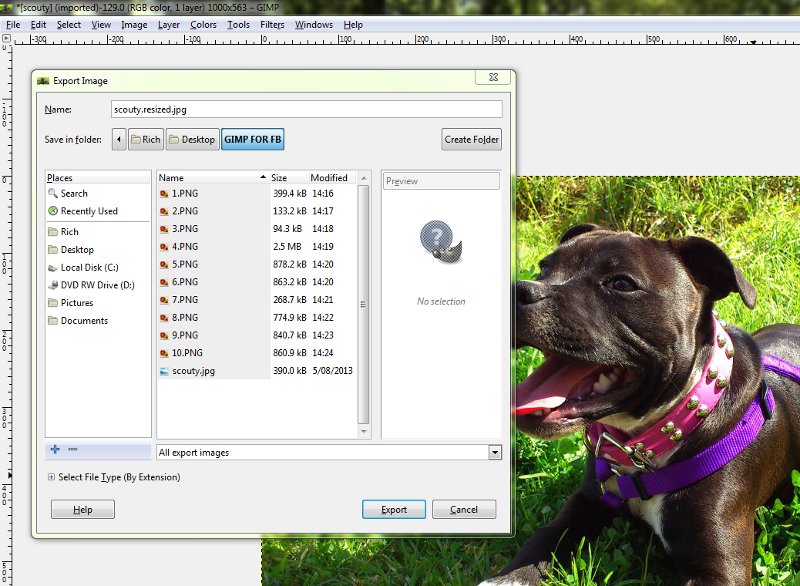
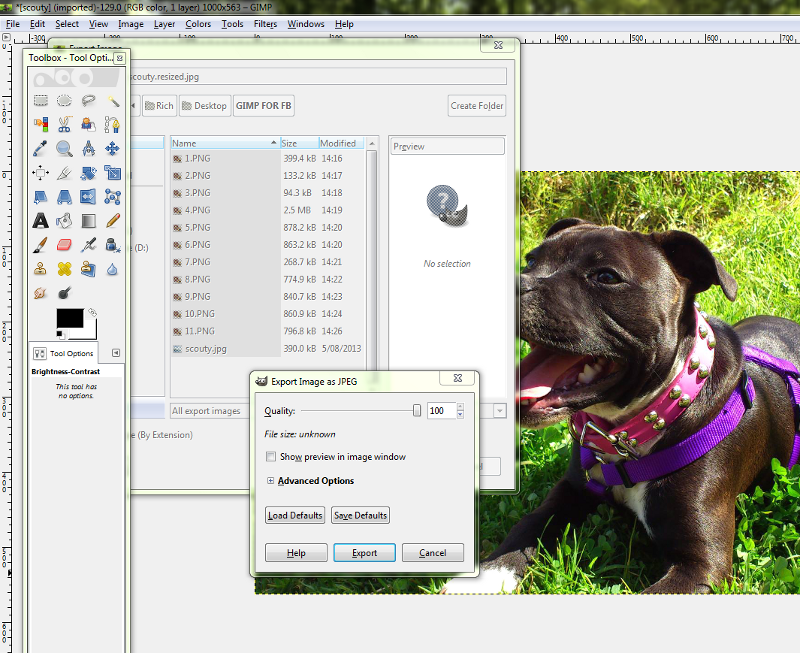
Step 13. If you are saving the image as a .jpg (what we will use 99% of the time) then Gimp will ask you which quality setting you would like to apply. Higher quality settings mean bigger file sizes but they also mean better pictures. I always choose 100% for my photos. Select the Export button when you've set the quality slider.
Step 14. Shut down Gimp by clicking the Close Window X button on the upper right. Gimp will ask you if you want to modify the original image so its the same as the one you just saved. Click Close Without Saving and your original photo will remain untouched, preserving it for future work.
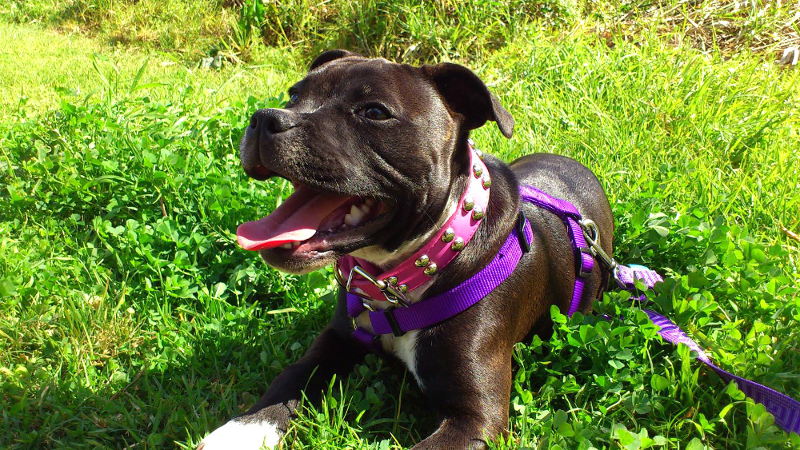
Step 15. Find where you saved your modified image and take a look at it. Upload it to facebook and enjoy.
Congratulations, Now you can enjoy awesome photos on Facebook and be the envy of your friends !!
Rock on back to the menu page to see what else you can do with this awesome software.
(C) All rights reserved.